We’re down to one.
After several heartbreaking nights, my group managed to get Scarlet Monastary down on gold and went back to help finish out Scarlet Halls for me. The Monastary is arguably the hardest challenge mode in the game!
We’ll see though as we still have Stormstout Brewery to blast through before we collect our full suite of Challenge Mode rewards.
The main issues with Scarlet Monastary isn’t the bosses. It’s actually the insane trash pulls. Cooldown and ability usage must be pinpoint. We actually screwed up slightly on Whitemane and pulled extra trash when we didn’t have to but finished 7 seconds away from the Silver mark.
There’s a few pressure points in Scarlet Monastary, so I’ll walk you through the toughest ones. Make sure you come into Scarlet Monastary prepared with the 18 second Invisibility Potion. You’ll need it. The most frustrating part is that if you wipe shortly in the cathedral area, you’ll have to wait several punishing minutes until your potion cooldowns are available for usage.
Right as the Challenge Mode timer finishes counting down, you can activate your Spirit Shell to grant your party additional shi elds as they get through that first pull. Spirit Shell should be off cooldown around the time you pull the Frenzied Spirits before the boss.

You’ll want to have a Death Knight handy. You can charm one of the Frenzied Spirits as it it gradually builds up a buff (also called Frenzied Spirit). Our Death Knight rounded them all up and applied a slow and gradually kited them around while our Shaman and Monk chained AoE stuns back to back. Now the buff increases the Spirit’s damage and attack speed by 15% and it stacks. Our fastest kill on Thalnos the Soulrender was around 31 seconds. I think the Spirit had around 40+ stacks coupled with Heroism.
In the first pull in the hallway shortly after taking down that first boss, I suggest yanking the two yellow mobs and taking them out. Odds are you’ll pull them and the big pack around the corner. As a healer, try to be the first one in so you can start drinking before the rest of your group initiates. Light off and chain your AoE stuns one after the other. You can use a Barrier here if you’re struggling, but it’s not quite necessary.

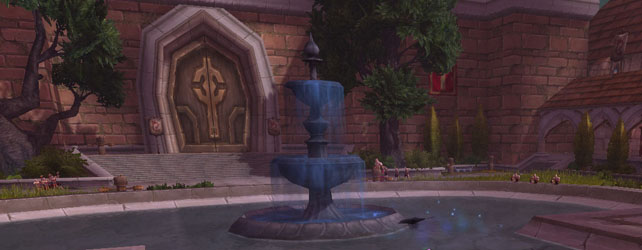
Burn the Invisibility Potion and break out into a run across the courtyard. Go up the right stair case and hop onto the fountain walls. Make sure you don’t come out of stealth near the 3 monks sitting on the right part of that fountain. Our tank pulled Brother Korloff when he was in the middle of patrolling between the 6 monks that flank that entrance to the monastary.
Brother Korloff will charge the furthest player and unload Firestorm Kick. Be really wary of where you stand. You want to position yourself just in the area in front of the fountain so that you don’t pull the aforementioned trio of monks. As the healer, don’t be the furthest one away. Shouldn’t have too many problems with this one at all. It’s just a little long.
Once you defeat the Monk, your next task is to try to penetrate the Monastary without pulling the monks on either side. The margin of error here is extremely small. Even a quarter step in either direction is enough to pull the pack and destroy your group. Now if you pay close attention to the positioning of the monks, you’ll notice they’re not exactly lined up perpendicular to the entrance. They’re actually angled inwards. What we ended up doing was using a hard CC (like Hex) on the back right Monk. This helped increase our margin just large enough that we could get through safely.
We tried CCing both the back Monks but the back left Monk managed to aggro on to us while we were inside the Cathedral so we ended up CCing the back right one only.
Anyway, take a hard left when you’re inside the Cathedral and start working on the pulls. There’s three major multi-mob pulls that can annihilate your group. Space out your stun cooldowns and healing cooldowns. For example, our Monk and Shaman used their stuns on the first pack. I used a Barrier and our Death Knight used Army of the Dead on the second. Use the pillars to line of sight pull them. Your interrupters should just pick a Purifier and lock them down while AoEing.
If you can get within striking range of Whitemane and Durand with 4:30 left, you should be in good shape. Stay close to each other so that Durand doesn’t get too far off. Assign specific interrupts for Mass Resurrection and Dominate Mind for Whitemane. You can let Smite go off unchecked as it’s easily healable. We screwed up here and accidentally pulled a Scarlet Zealot in addition to Durand. Use your AoE cleaves and single target abilities to get rid of that Zealot fast. Make sure he doesn’t cast Heal on the boss.
Good luck! I know I made it sound easier than it actually was. Scarlet Monastary will end up being one of the longer ones your group is working on just due to the difficulty of the trash and the potion cooldowns.