Dimensius is the final encounter of Manaforge Omega and easily the most mechanically intense fight of the tier so far. From multidimensional knockbacks to skyriding soak mechanics, this fight will demand a blend of high throughput, smart positioning, and clutch movement reads. As a Holy Priest, your abilities will shine here, especially with well-timed usage of your cooldowns and game awareness.
Let’s walk through what to expect and how to best prepare from a healing perspective.
Pre-fight Setup
Before you even start, make sure your raid is divided into two equal groups on both the left and right sides.
Phase 1: Critical Mass
The fight begins when everyone takes the portal using the extra action button. Our group typically hits the button at the 1-second mark on the pull timer. Once inside, each side needs to burn down the Living Mass. Ideally, a ranged player or healer should pick up the Excess Mass when it drops. Avoid having a melee do it, since they’ll lose uptime and might be needed to pull people down during Gravity later.
The two Excess Mass players will come together and combine their debuff to drop a large puddle that helps keep the raid rooted, preventing them from getting inhaled by Dimensius.
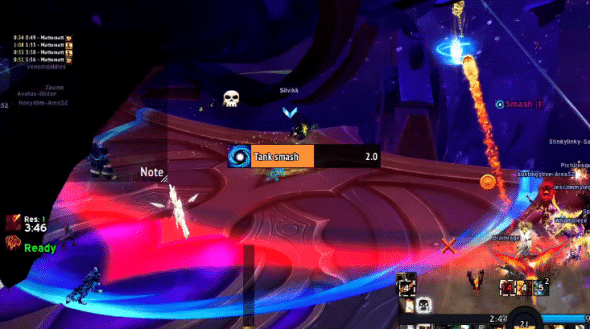
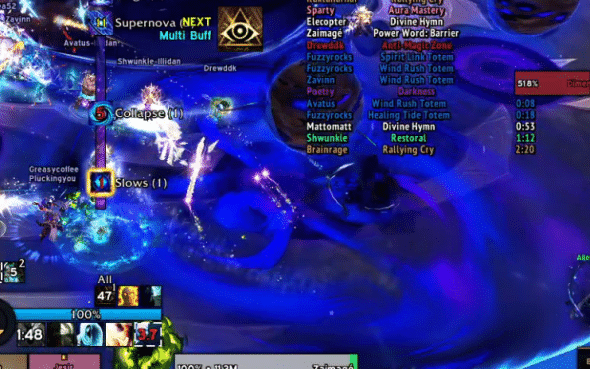
After that, the raid splits up again. Watch for the tank smash, which knocks everyone back. Position yourself to the sides and outside the blue circular smash zone. Avoid standing behind the boss, or you’ll likely get launched off the platform. Let the knockback carry you sideways to help place your puddle at the edge as this pool remains for the rest of the phase.
We Dragon Priests have it pretty easy!
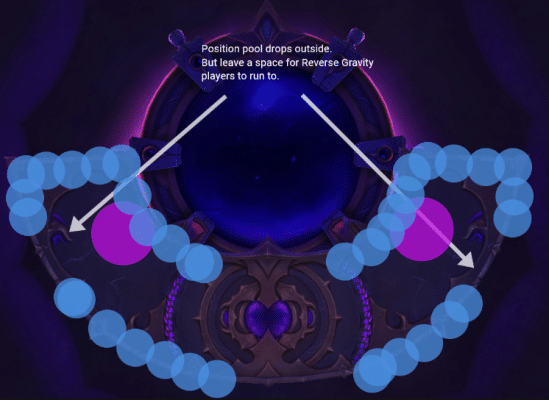
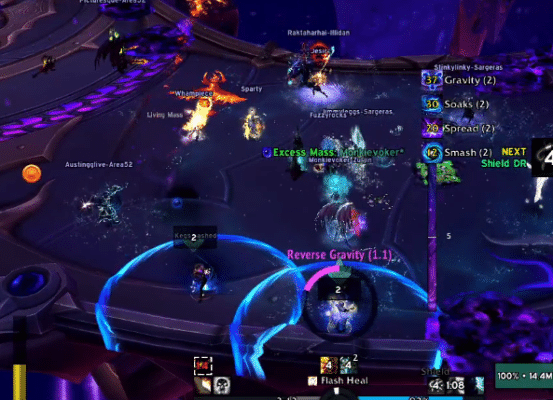
After the puddles, each side gets a group soak mechanic. You don’t have to be in it as a healer, but jumping in helps smooth things out. I like using Divine Hymn on the first set and Apotheosis on the next to stabilize the group. Once the new Living Mass is killed, ranged DPS must stand underneath the Reverse Gravity players to pull them down from the air.
When Dimensius hits 0% HP, it’s time for liftoff.
Intermission 1: Event Horizon
This first intermission sends you flying through space. I recommend using Squeakers, the Trickster or Red Flying Cloud mounts for visibility.
You’ll fly through rings and dodge obstacles like meteors and black holes. Skilled players can aim for the mini spheres in the sky, which deal around 6% damage to the large Voidwalker add when you land. Three of them spawn per ride and only one person can grab each.
Every ring you pass through refreshes your debuff timer to 9 seconds. Make sure you’re always within reach of the next one.
Phase 2A: The Dark Heart
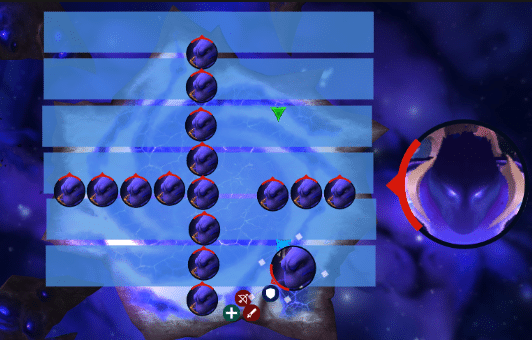
After landing, group up in the front-left quadrant of the platform (triangle marker) on the map below. This phase is all about triage healing, light movement, and add control.
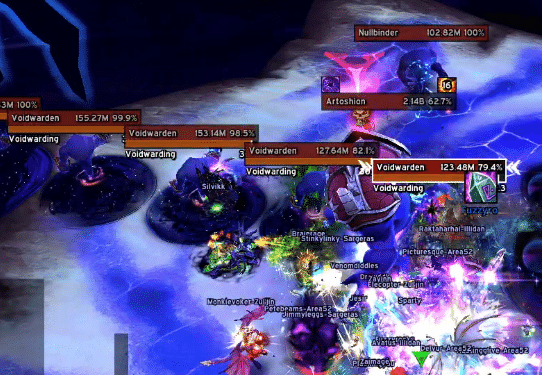
Key enemies:
- Artoshion is the named mob here. This phase ends upon his death.
- Voidwardens form a wall that cut off access to the rest of the platform.
- Nullbinder‘s will have a cast ability called Nullbinding. On heroic, they deal 3.7 million damage plus a 1.2 million damage Shadow damage every 2 seconds, and it reduces movement speed. It’s a stacking effect.
Your first goal is to punch a hole through the Voidwarden wall, starting with the one closest to the middle. This gives your team travel access to the opposite side of the platform.
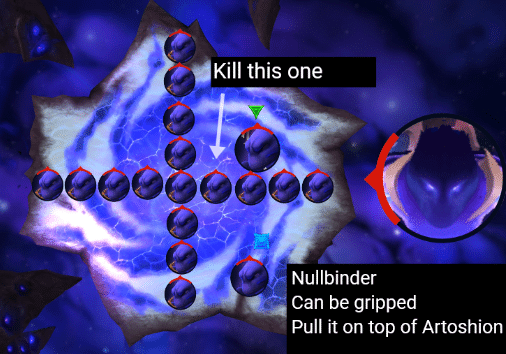
The raid needs to focus on punching a hole through the Void Wardens. Target the one closest to the middle that allows you to travel to the far side of the platform.
Watch Dimensius’ fist to predict meteor throws. If he pulls it back, that side is not safe. Move to the other edge accordingly to avoid the incoming pushback.
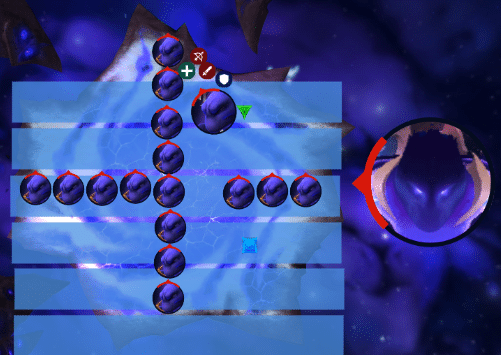
Once the meteor resolves, run up to Dimensius and get ready for a massive pushback. Use Wind Rush Totem, Stampeding Roar, or a Warlock Gateway to resist. If your group lacks movement options, you may need to break another hole through the Voidwarden wall to buy space.
The cycle continues until Artoshion dies. If he lives too long, Voidwardens regenerate and your DPS needs to refocus.
Once Arthosion is slain, it’s time to mount up and fly to the next platform!
Healing tip: AoE healing is steady, not bursty. I use Divine Hymn right before the pushback to top everyone off. Commit one of your 2-minute cooldowns here so it’s ready again for the final phase.
Get ready to mount again, because you have another set of rings to weave through.
Intermission 2: Event Horizon Bugaloo
Same concept, just without the massive meteor wall from before. Fly through rings, collect spheres, dodge hazards. You know the drill.
Phase 2B: Pargoth Platform
Pargoth is another named Voidwalker. Melee players need to watch out for his AoE ground slam, which has a wide blue circle indicator.
This phase mirrors Phase 2A:
- Burn a hole through the Voidwarden wall.
- Keep Nullbinders stunned or silenced. Never ever let a cast go off.
- Be prepared to kill two sets of Voidwardens.
- Don’t get baited by low Pargoth HP. Focus on the wall first to ensure safe positioning.
Once Pargoth falls, you’re in the home stretch.
Phase 3: Singularity
Upon landing on the last platform, pop Heroism/Bloodlust immediately. Healers can help DPS here, as there’s a brief downtime before Dimensius fully activates.
Keep the raid stacked and dodge the initial falling rocks. These will start moving around the platform and deal rot damage over time.
Healing tip: With all the movement required, Divine Hymn might be hard to use effectively. Rely on Oracle buffs and instant-cast tools to keep up.
The Rings: You’ll see a series of rings pulsing out. When the first one activates, stand close to it to apply the debuff. You have a 3-second buffer to pick up the next one. Don’t overlap or it’ll be lethal.
I recommend standing beside the first, then visually tracking the second as it charges up so you’re ready to move into it. Repeat for the third.
Devour: Dimensius casts Devour, and you’ll need to hide under a rotating rock. Pop a defensive like Fade and stay near the front of its rotation to maximize casts. Heal lower HP players first. Once Devour ends, that rock becomes a Black Hole, killing anyone it touches.
Keep using your Holy Words on cooldown. There’s lots of ticking damage here.
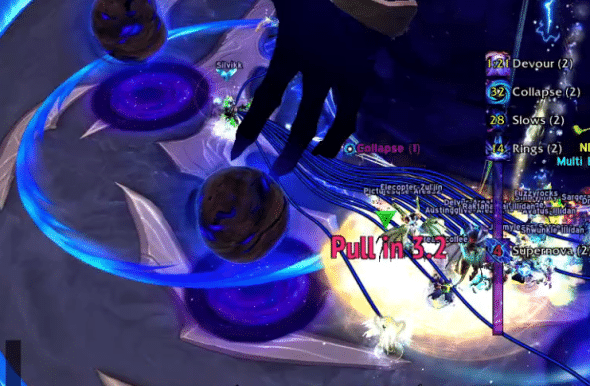
The raid should move left while tanks rotate right. Don’t stack on the tank. Cosmic Collapse will knock back anyone inside their blue circle (more on this next). This is followed by a pull-in. Make sure you have a clear line of sight to the tank, free of rocks and hazards.
You’ll want to meet up with the tank on the opposite side but do not stack with them just yet. The tank will have a giant blue circle around them, and this is the Cosmic Collapse ability. Anyone in that could get knocked backwards (and off the platform). On heroic, this is followed by a pull-in mechanic. Make sure you position yourself in such a way that you have a clear path to the tank and that Dimensius or any of the rocks (or Black Holes) aren’t in the way. You can fight and resist it slightly.
This pattern repeats:
- Move with the tank rotation.
- Handle another set of Rings.
- Rotate again after Supernova.
- Continue until Dimensius is down.
As the fight progresses, the platform will shrink. Space becomes limited. Save a Battle Res for a tank. Healing isn’t too intense here, so if a healer dies early, you can delay the rez or use it on a DPS instead.
Wrap-Up
Heroic Dimensius is chaotic, but conquerable. It’s a fitting end to the expansion. Once you bring him down, sit back and enjoy the final cinematic. You’ve earned it.